Category Archives: Life
Cell Phone Subsidizing lives on!!!
I suspect there are a lot of people in the world who are disappointed by the disappearance of cell phone subsidizing. “WHAT, I HAVE TO PAY FOR MY PHONE NOW?” At the end of the day it kind of all comes out in the wash for me, I never did contracts anyway because I simply don’t like being tied to a phone company, on principle, and dating back to the days of being in Alaska Communication’s noose.
For the people who miss those subsidies, I have great news. Not only are they back, but they’re back with a vengeance.
Let’s rewind to the beginning-ish of March. I’ve been with Verizon ever since I moved to MN. I still maintain my AT&T line and number, but just for aesthetic reasons. The only phone I use is my Verizon phone. I also recently got into the smart watch market, albeit the cheap way with a secondhand Moto 360. I won’t say I’m elated with the smart watch, but now that I’ve had it for awhile I definitely feel naked without it. The problem has been that the constant jabber between smart watch and smart phone has caused my aging Motorola phone to have less than acceptable battery life. That’s fine, the Samsung Galaxy S7 was just announced and it’s almost an adequate flagship handset, so I’ll just spend a few bucks and we’ll fix our battery problem and take an upgrade at the same time.
I go into the Verizon store at MOA. Overall the service was satisfactory (personable that is), although it definitely took longer than I wanted to achieve the goal I was seeking. I was not necessarily planning on walking out of there with anything new, the phone was still a pre-order and I just didn’t have the watch in mind. The deal is though – buy yourself a Galaxy S7 and get this sweet deal on the Samsung Gear S2. The sales guy went into adequate detail regarding Tizen, but he was also wearing one and was able to show me the benefits of having a 3g watch. I figured what the F, I’ll try it. What the Verizon salesman was not particularly clear on was that in order to get this sweet deal I was going back to good ol’ subsidized price modeling. So here’s what the *deal* looks like:
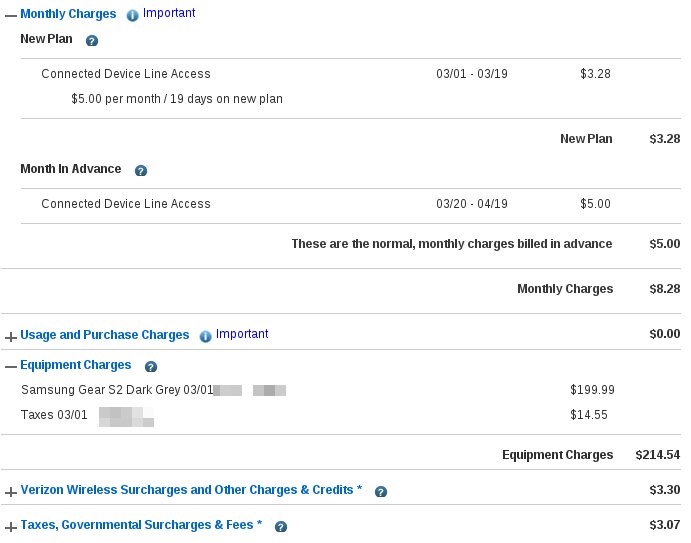
The points to take away:
1) The device “only costs me $5.00/mo” according to Verizon staff.
2) The great deal is $150 (43%) off of full retail cost of $350.
Regarding point 1, only $5.00 a month sounds great, but the reality is that it’s over twice that. If you look at surcharges that are in their control combined with governmental charges outside of their control, it’s actually more than double of the “only $5.00 a month.” I called today to talk about canceling it – the early cancellation fee is $175. Less than paying the $11.37 for the term of the contract, but not by a lot.
Regarding point 2, you used to be able to get iPhones valued at $500+ free right? Or is that me imagining things? Either way, it was way better than paying 57% of full retail.
I don’t like being under contract, I don’t like sneaky sales practices, and I don’t like being taken to the cleaners. When the math is done I will be paying (at best) $404.19 to own this thing for a month. The best I can hope for in the resale market is about $300. This month Verizon not only took their normal $150 out of my pocket for the services they provide, but they’re also hosing me for $100 additional that I’ll see no benefit from.
So thanks assholes at Verizon. I was recently shopping around because T-Mobile claims their network is fixed. The only reason I didn’t jump ship is because I honestly had very few complaints about Verizon besides the cost. Fact is they’re all too expensive though, and T-Mobile doesn’t give me any corporate discount on service, so continuing with big red just made sense. I have a new complaint, and after tomorrow my contract with you will be terminated.
As an aside – if you’re considering going from a proper Android Wear device to a Tizen based device, save your money and your frustration. Tizen is garbage, and because I see no looming Wear support coming for the device you’ll find mine on eBay as soon as I’m clear of the bounty on the device, in case you don’t trust my advice…
Steese cleanup, a decade in the making.
Last week I spent in Alaska. The purpose of the trip has been a purpose many trips have had as an aside, but this time it just had to get done. In Fox where my parents live only 1Mb Internet service is available. Their building also has a couple of tenants, all of which share the same Internet service. Up until last week they just had 4 modems, one person would connect to one, another to another, sometimes they didn’t all work and someone would switch out, etc. It was a big mess. To add to the logical mess of things, 10 years of wiring additions without clean and tidy installation got to be too much to handle.
The cleanup performed in 2005 – Before:

and after:
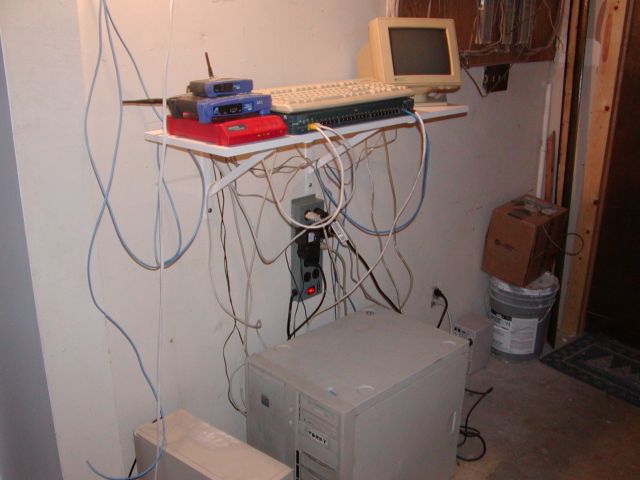
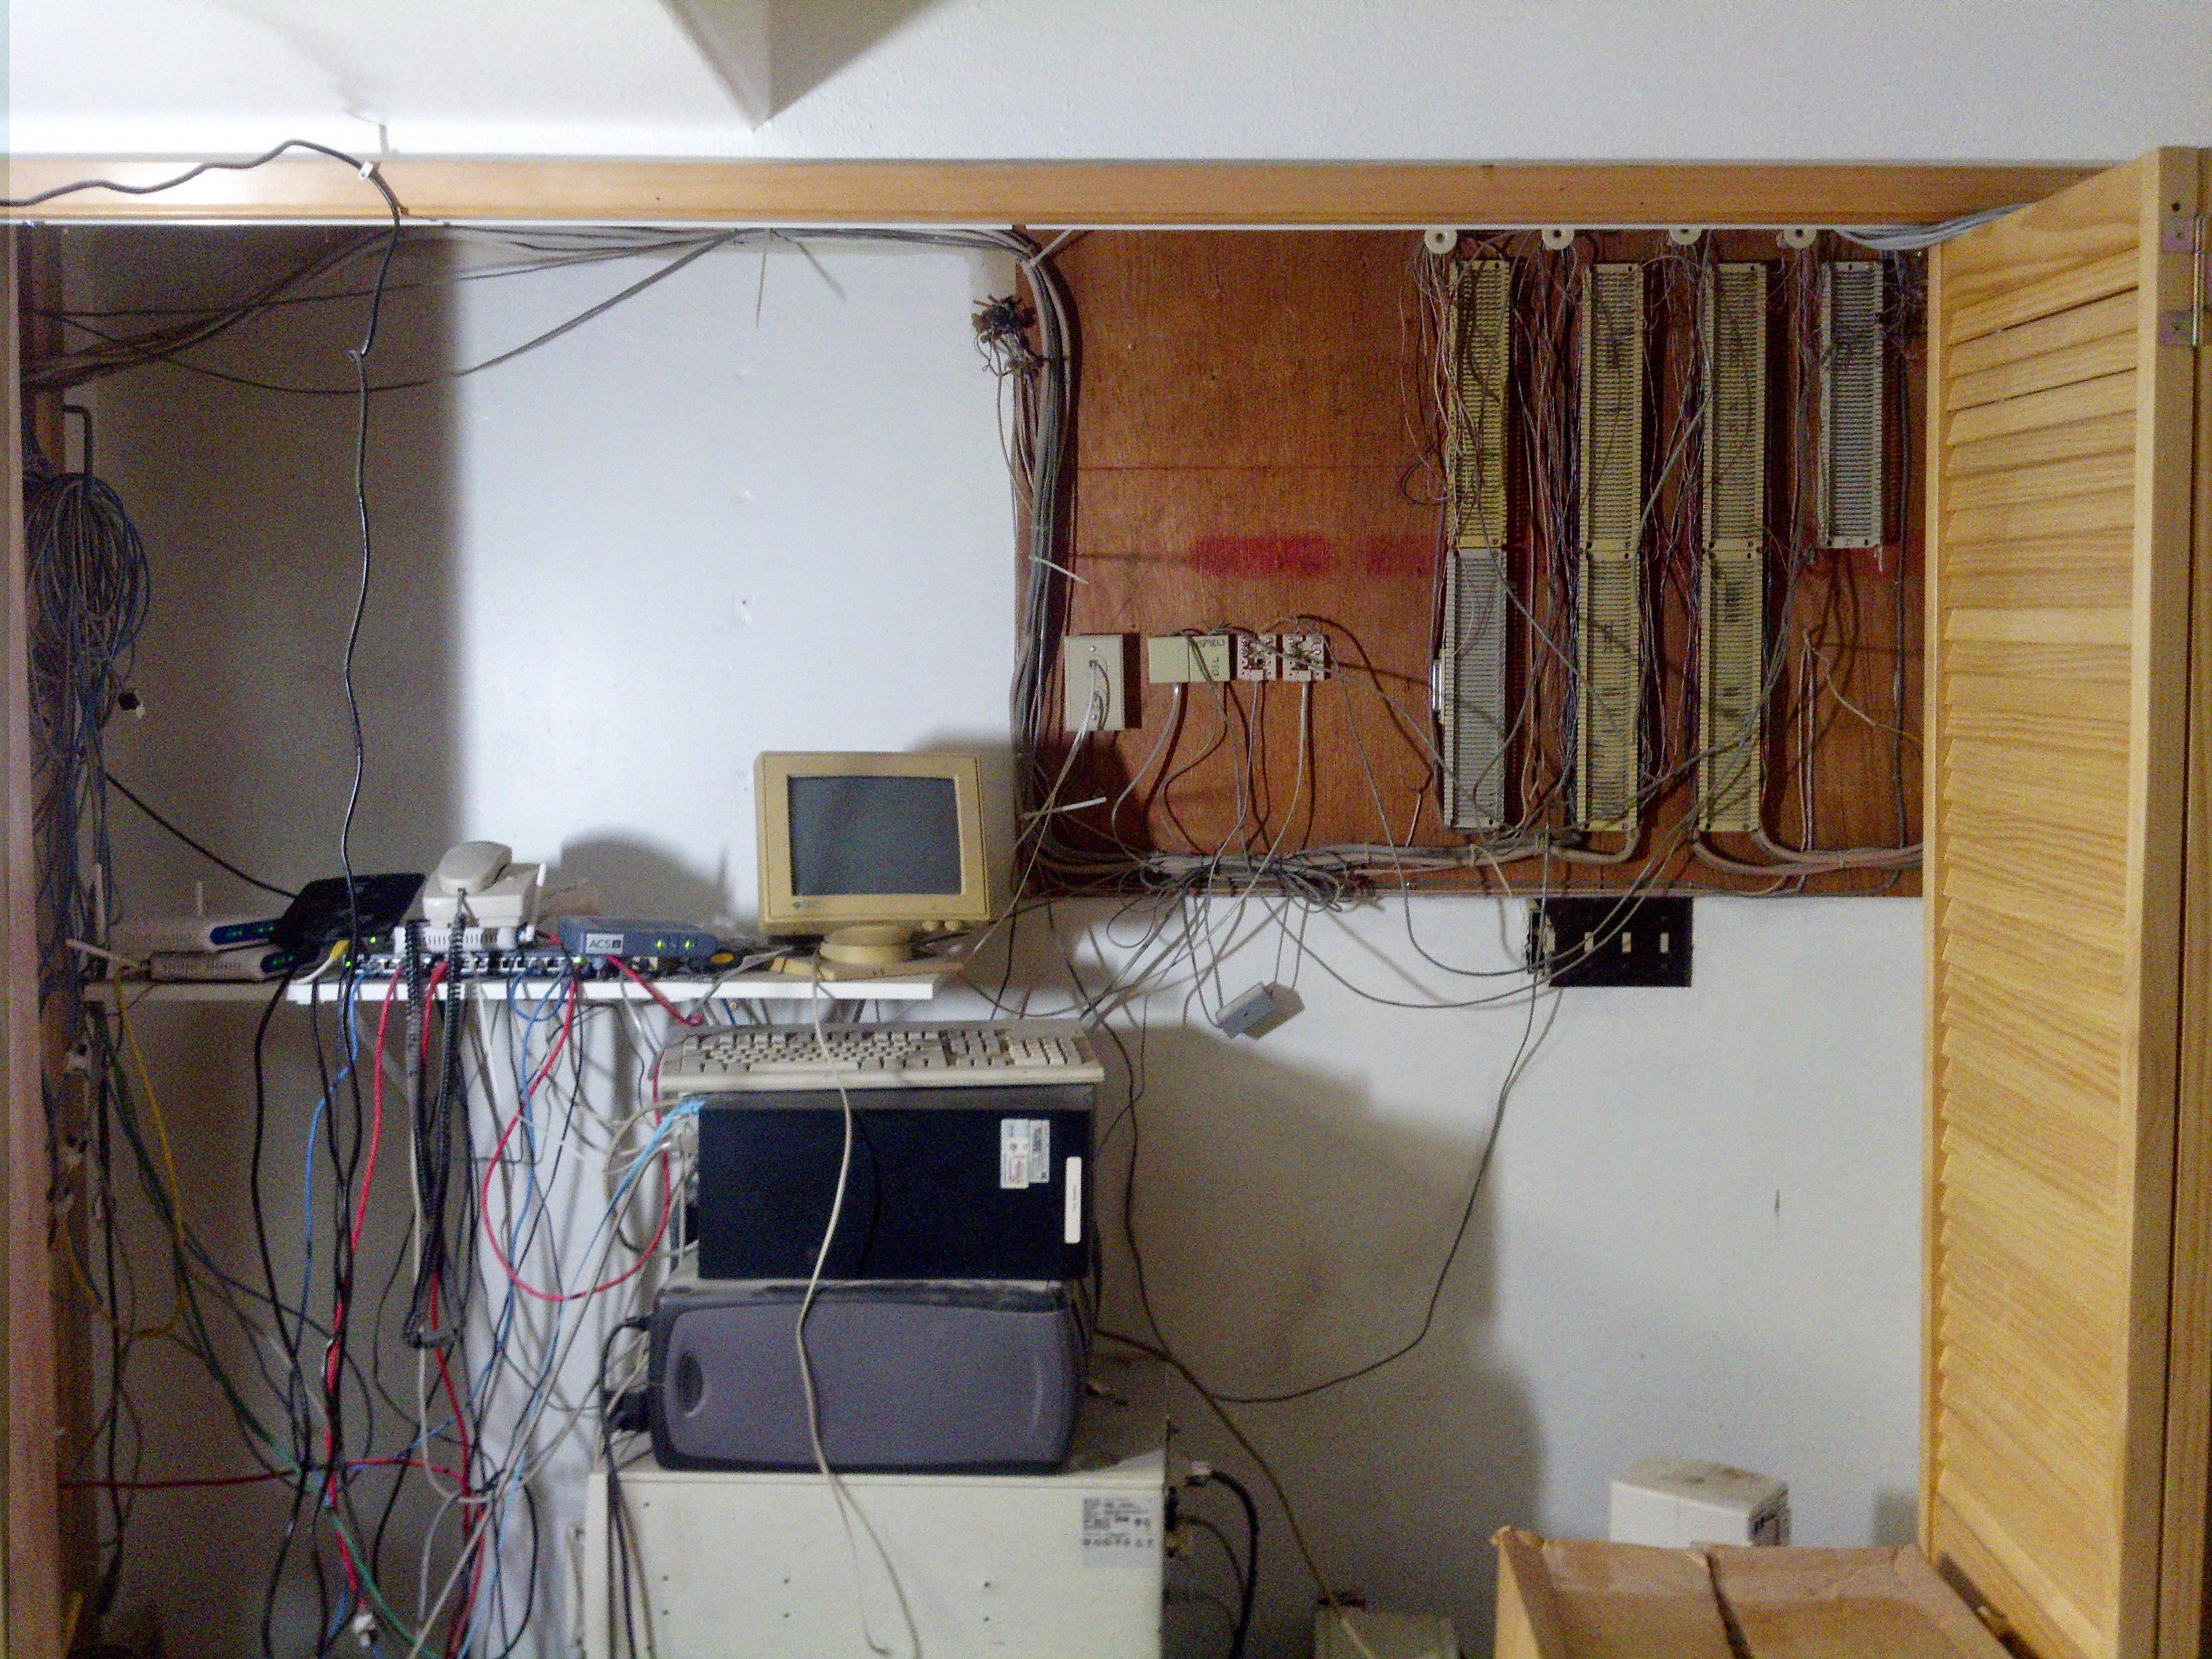
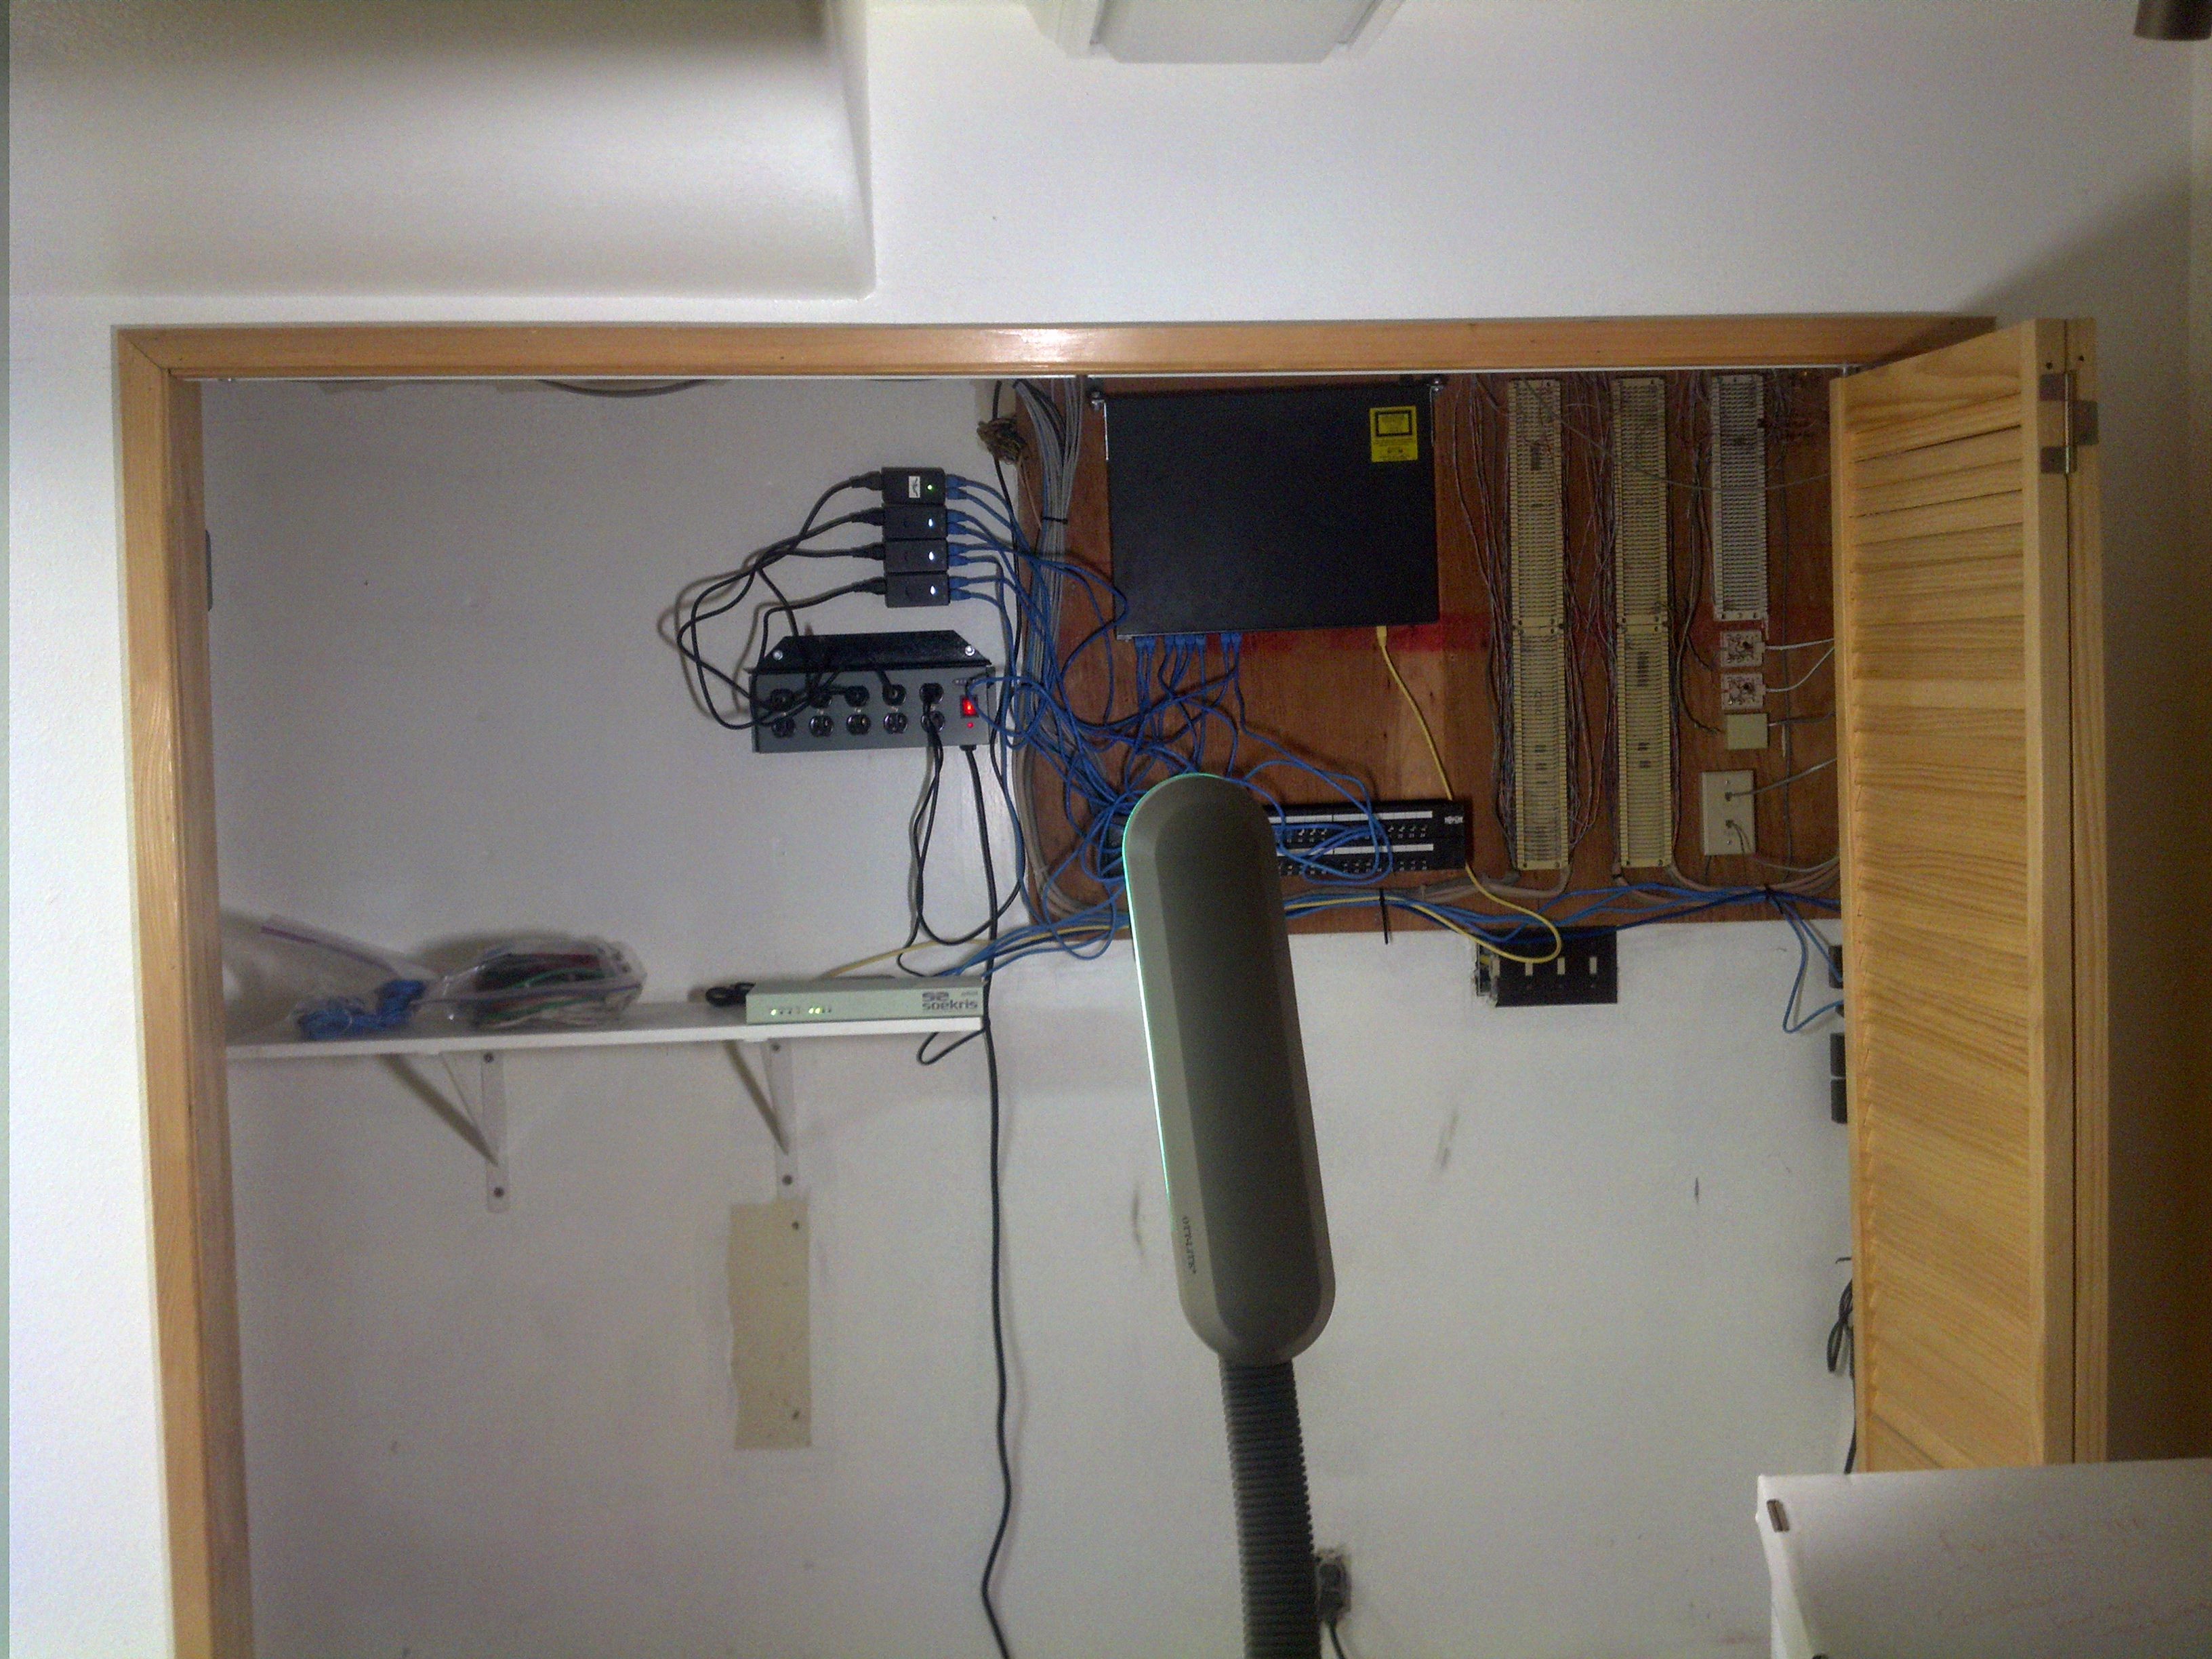
I felt pretty OK about that, but after 10 years of negligence this is where things ended up:
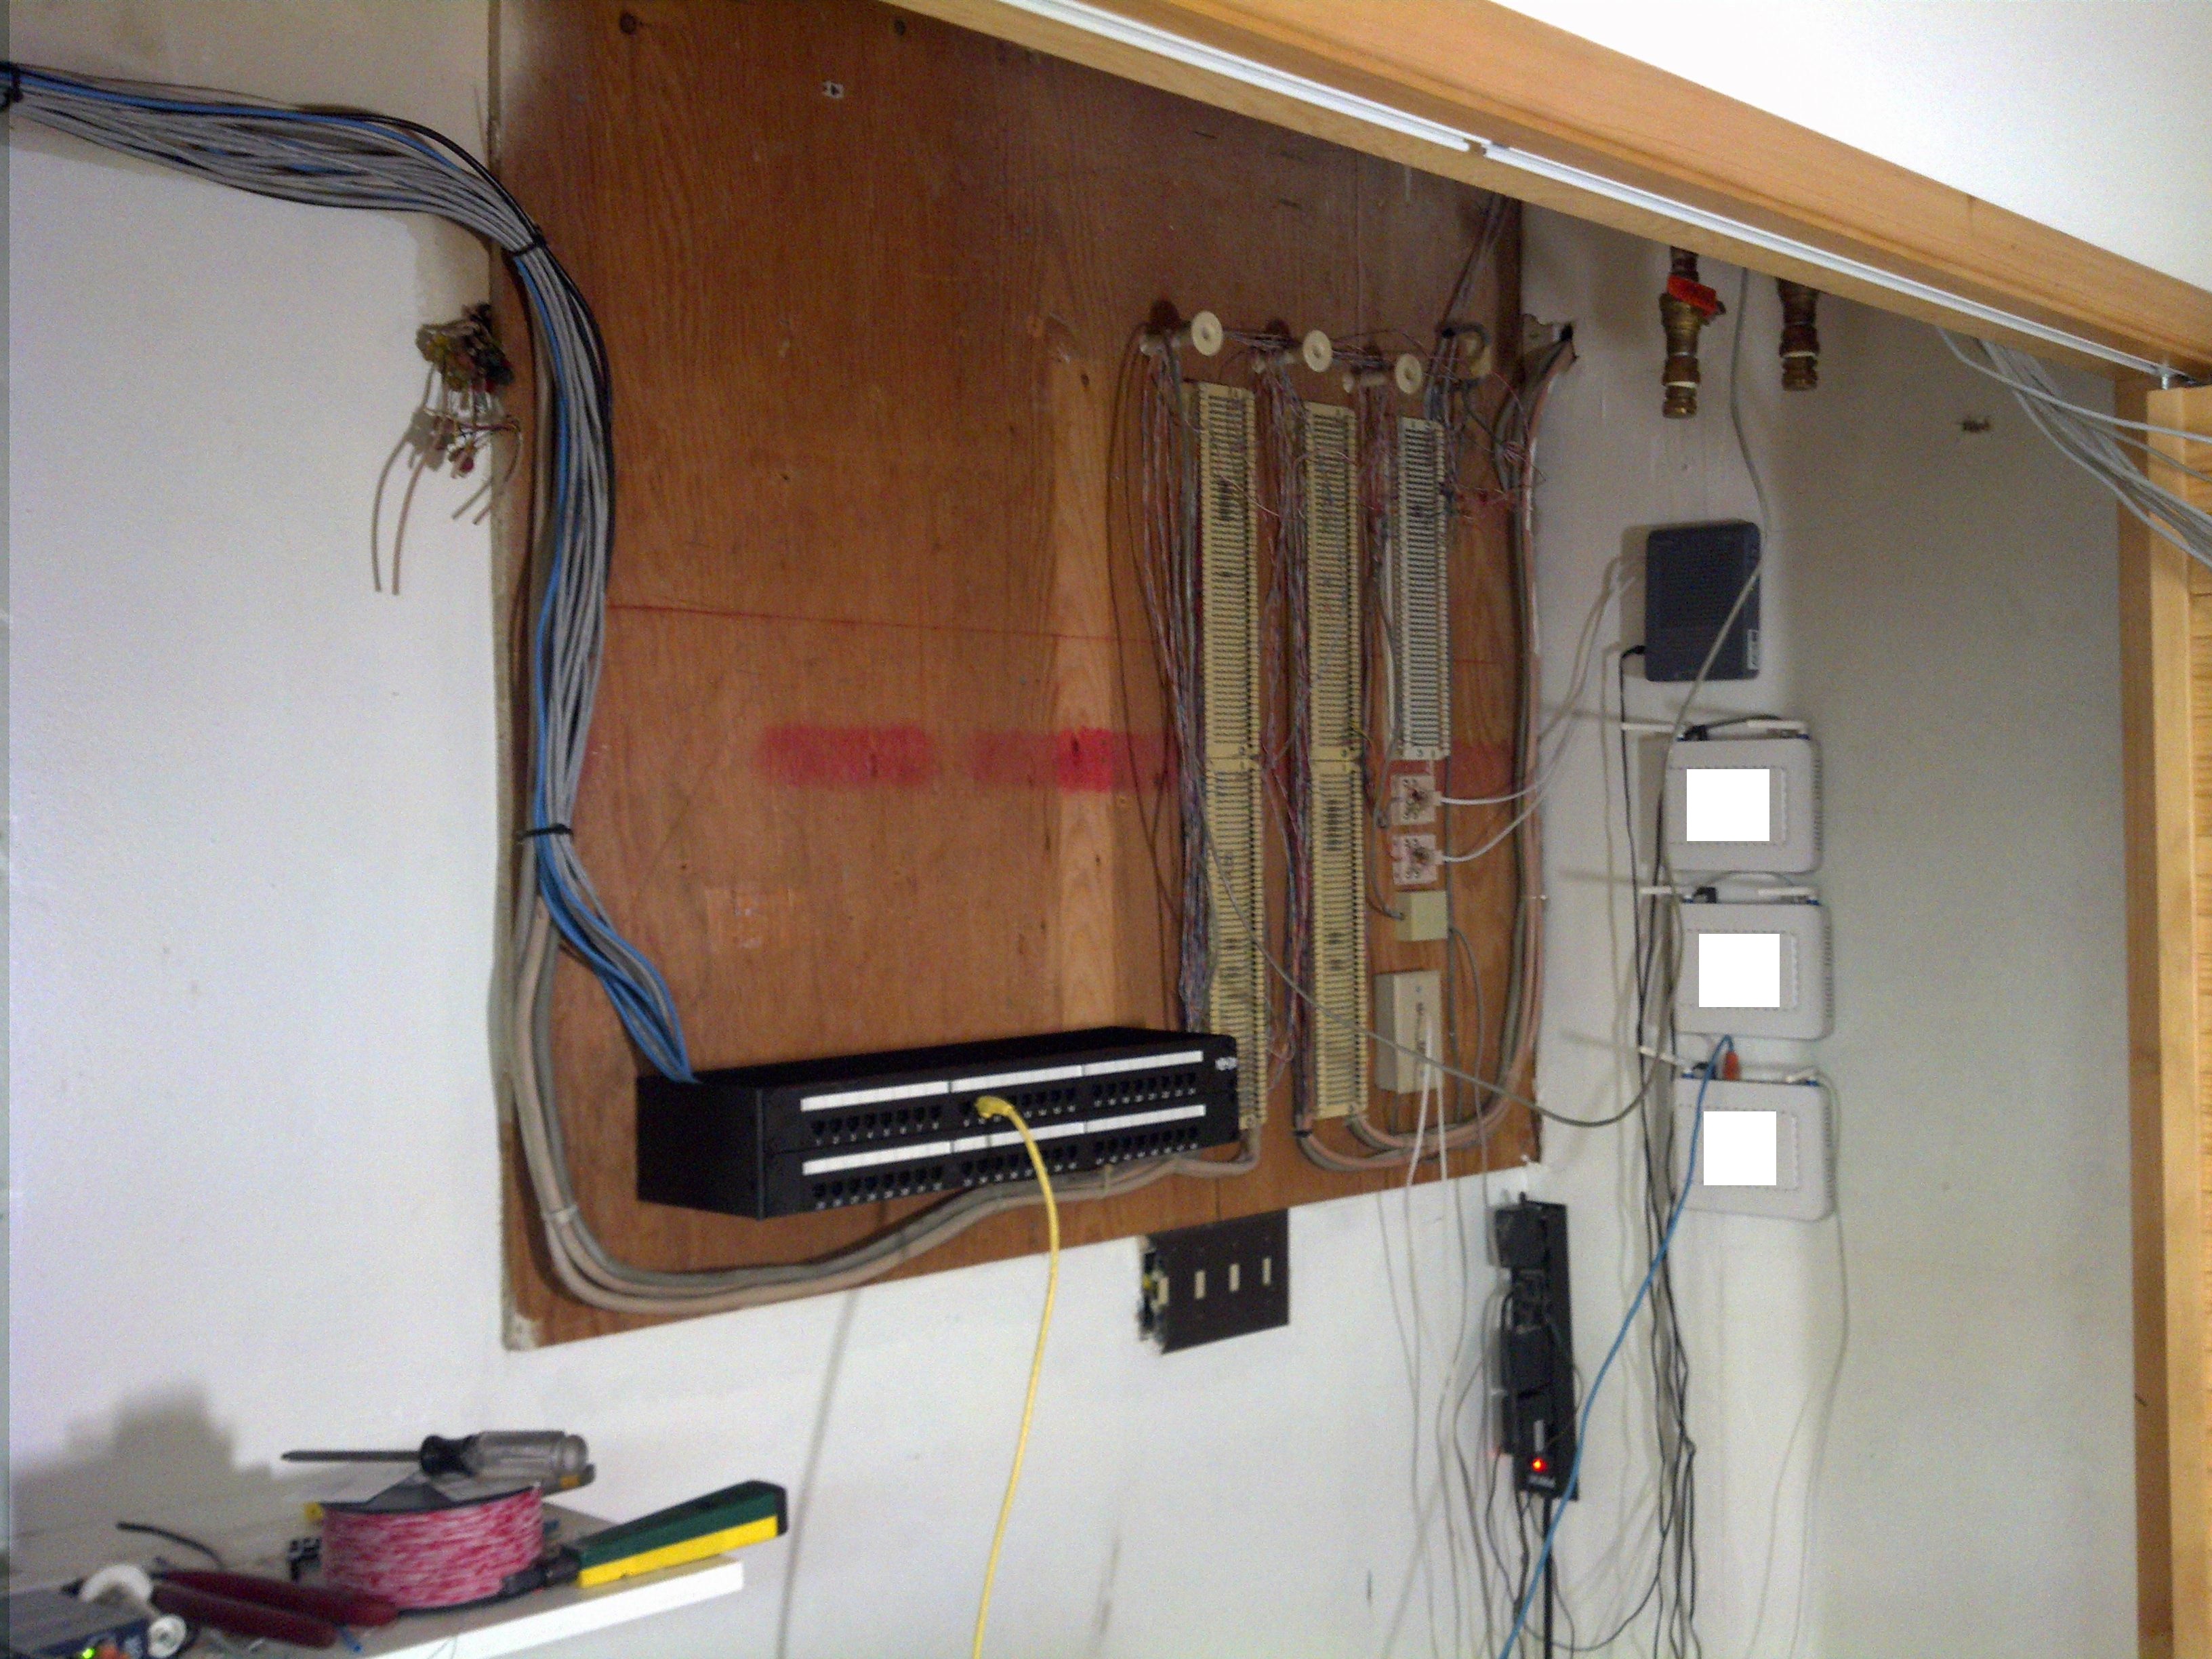
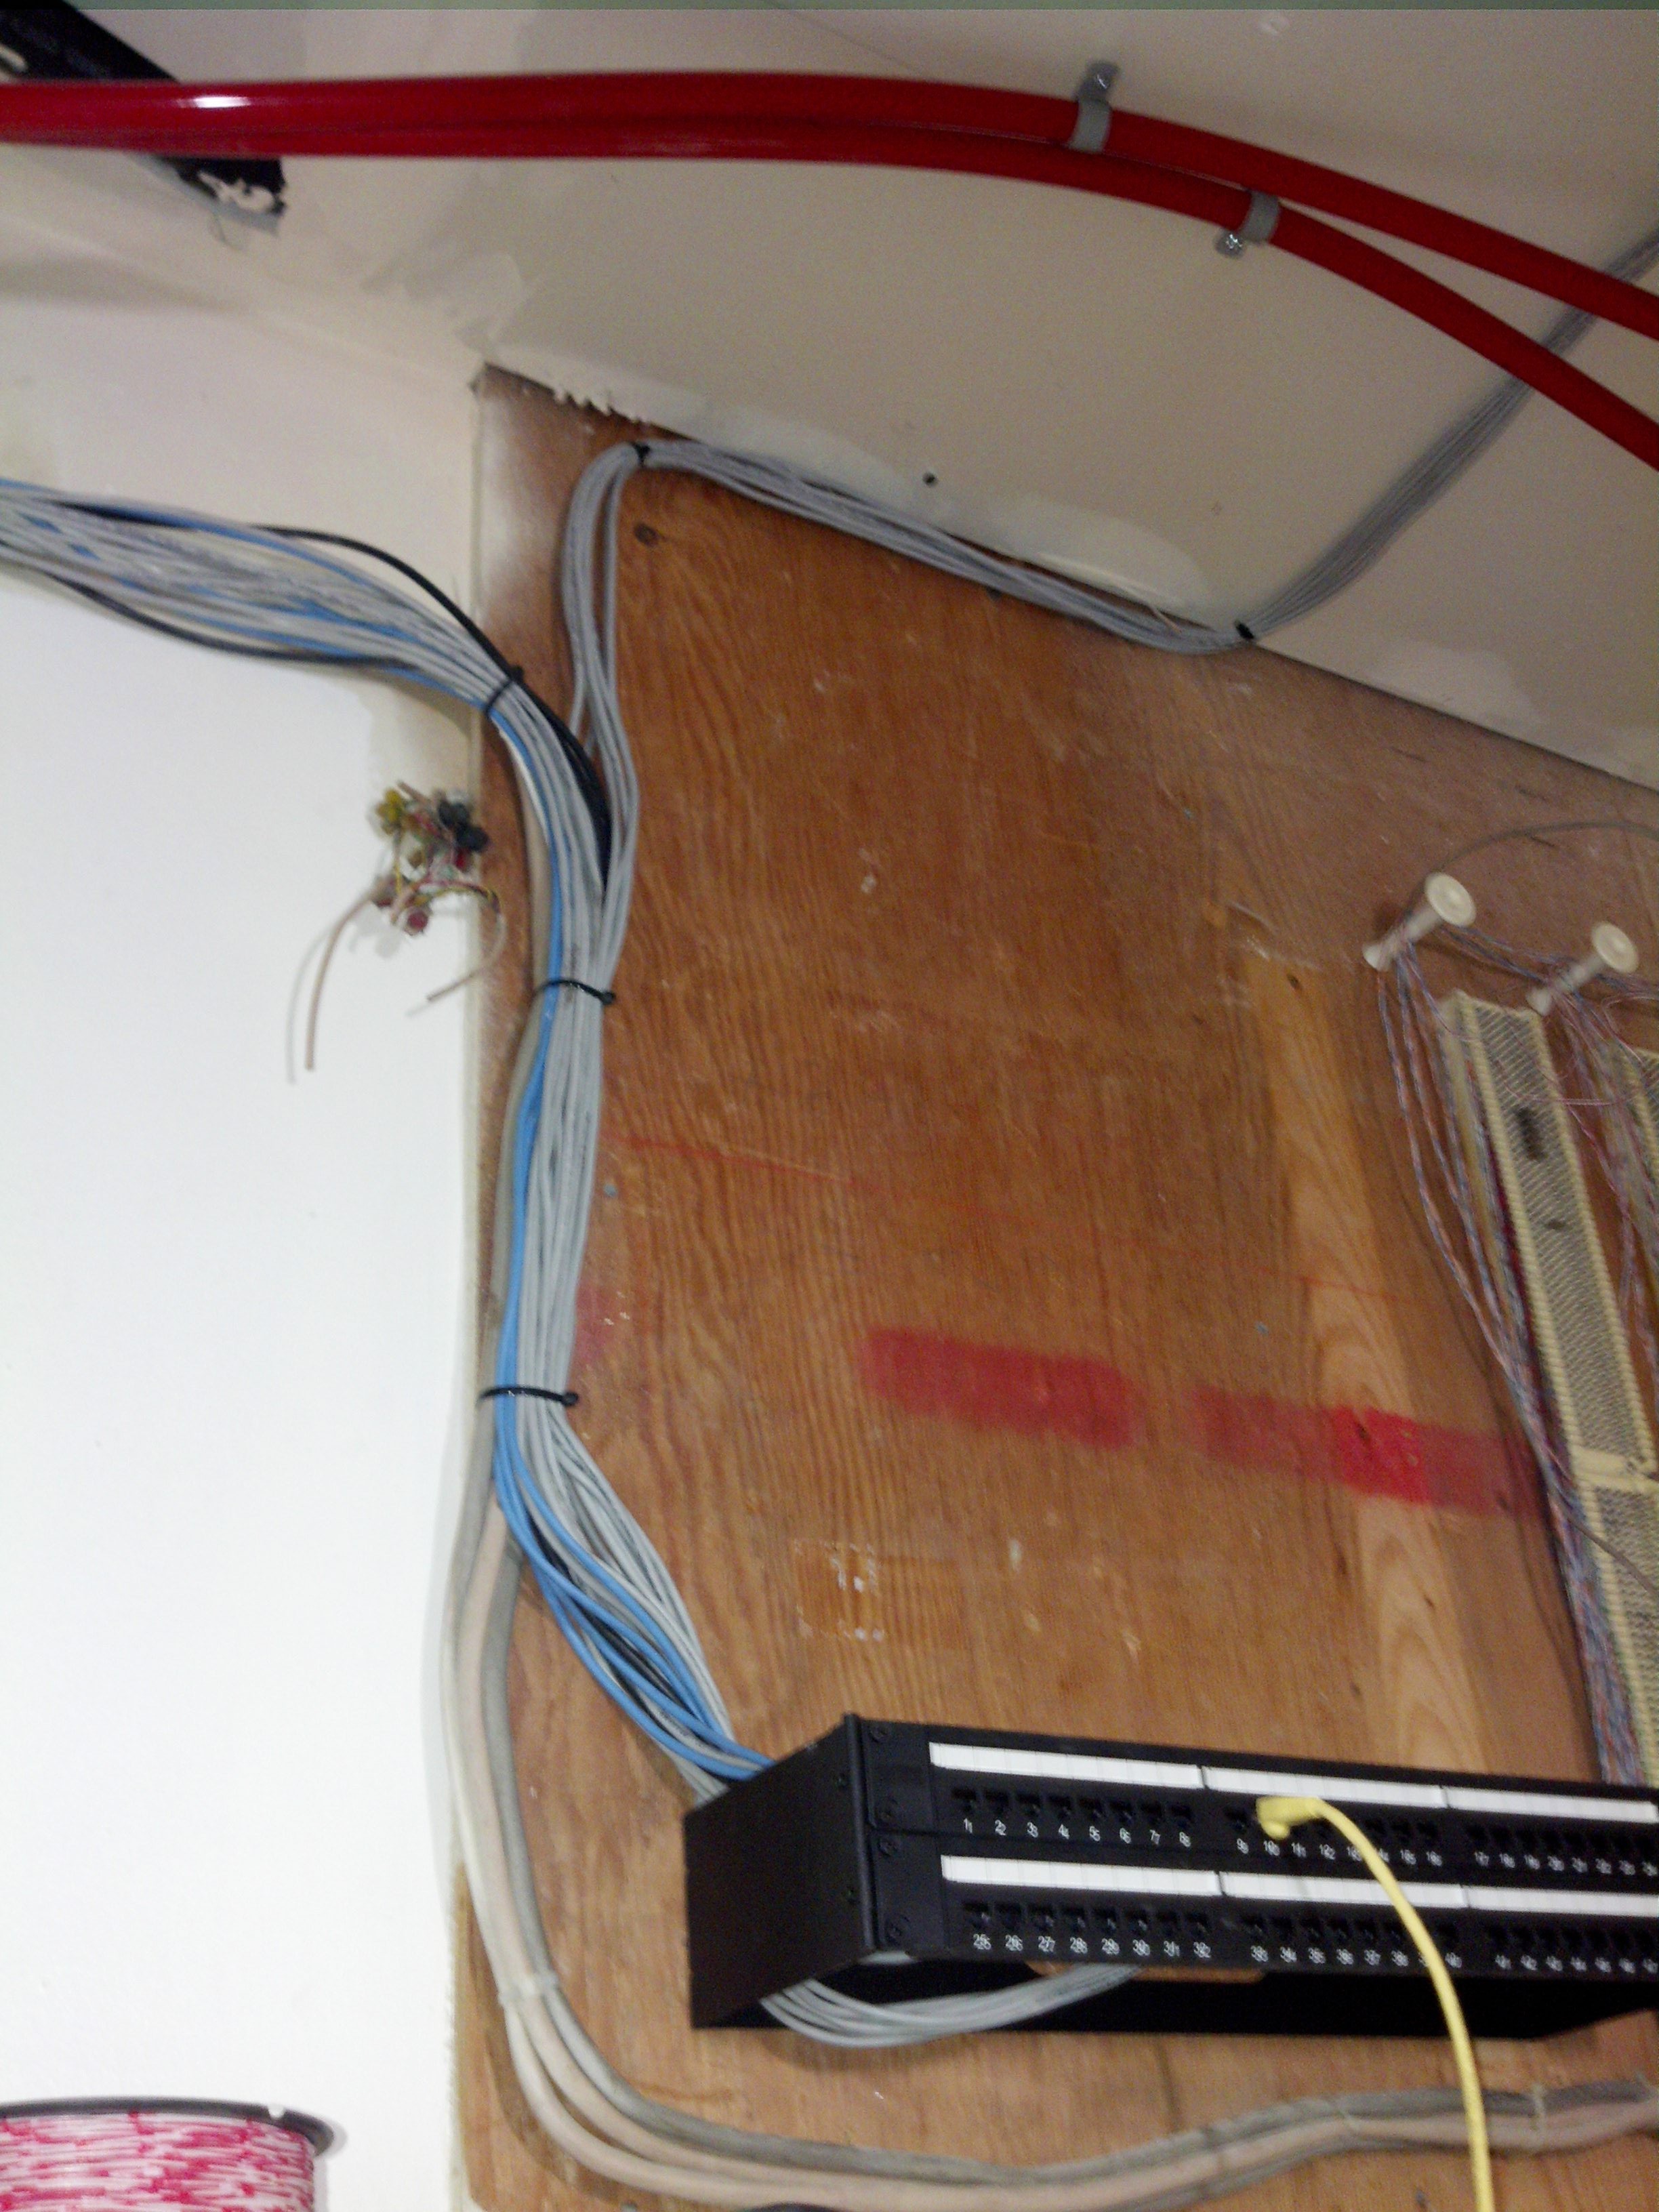
To start I removed… everything. I gutted all the clearly unnecessary wiring and relocated the modems to a more suitable location out of the way. This photo also includes the new patch panel which is probably the most substantial part of the cleanup, none of my before photos included the dangling wiring mess caused by the lack of a proper patch panel for the building:
Yes, I’m unwilling to provide free advertisement for the abysmal company that provides that building with Internet services.
Here you can see my punchdown work, not that I’m particularly proud of it, it is what it is:
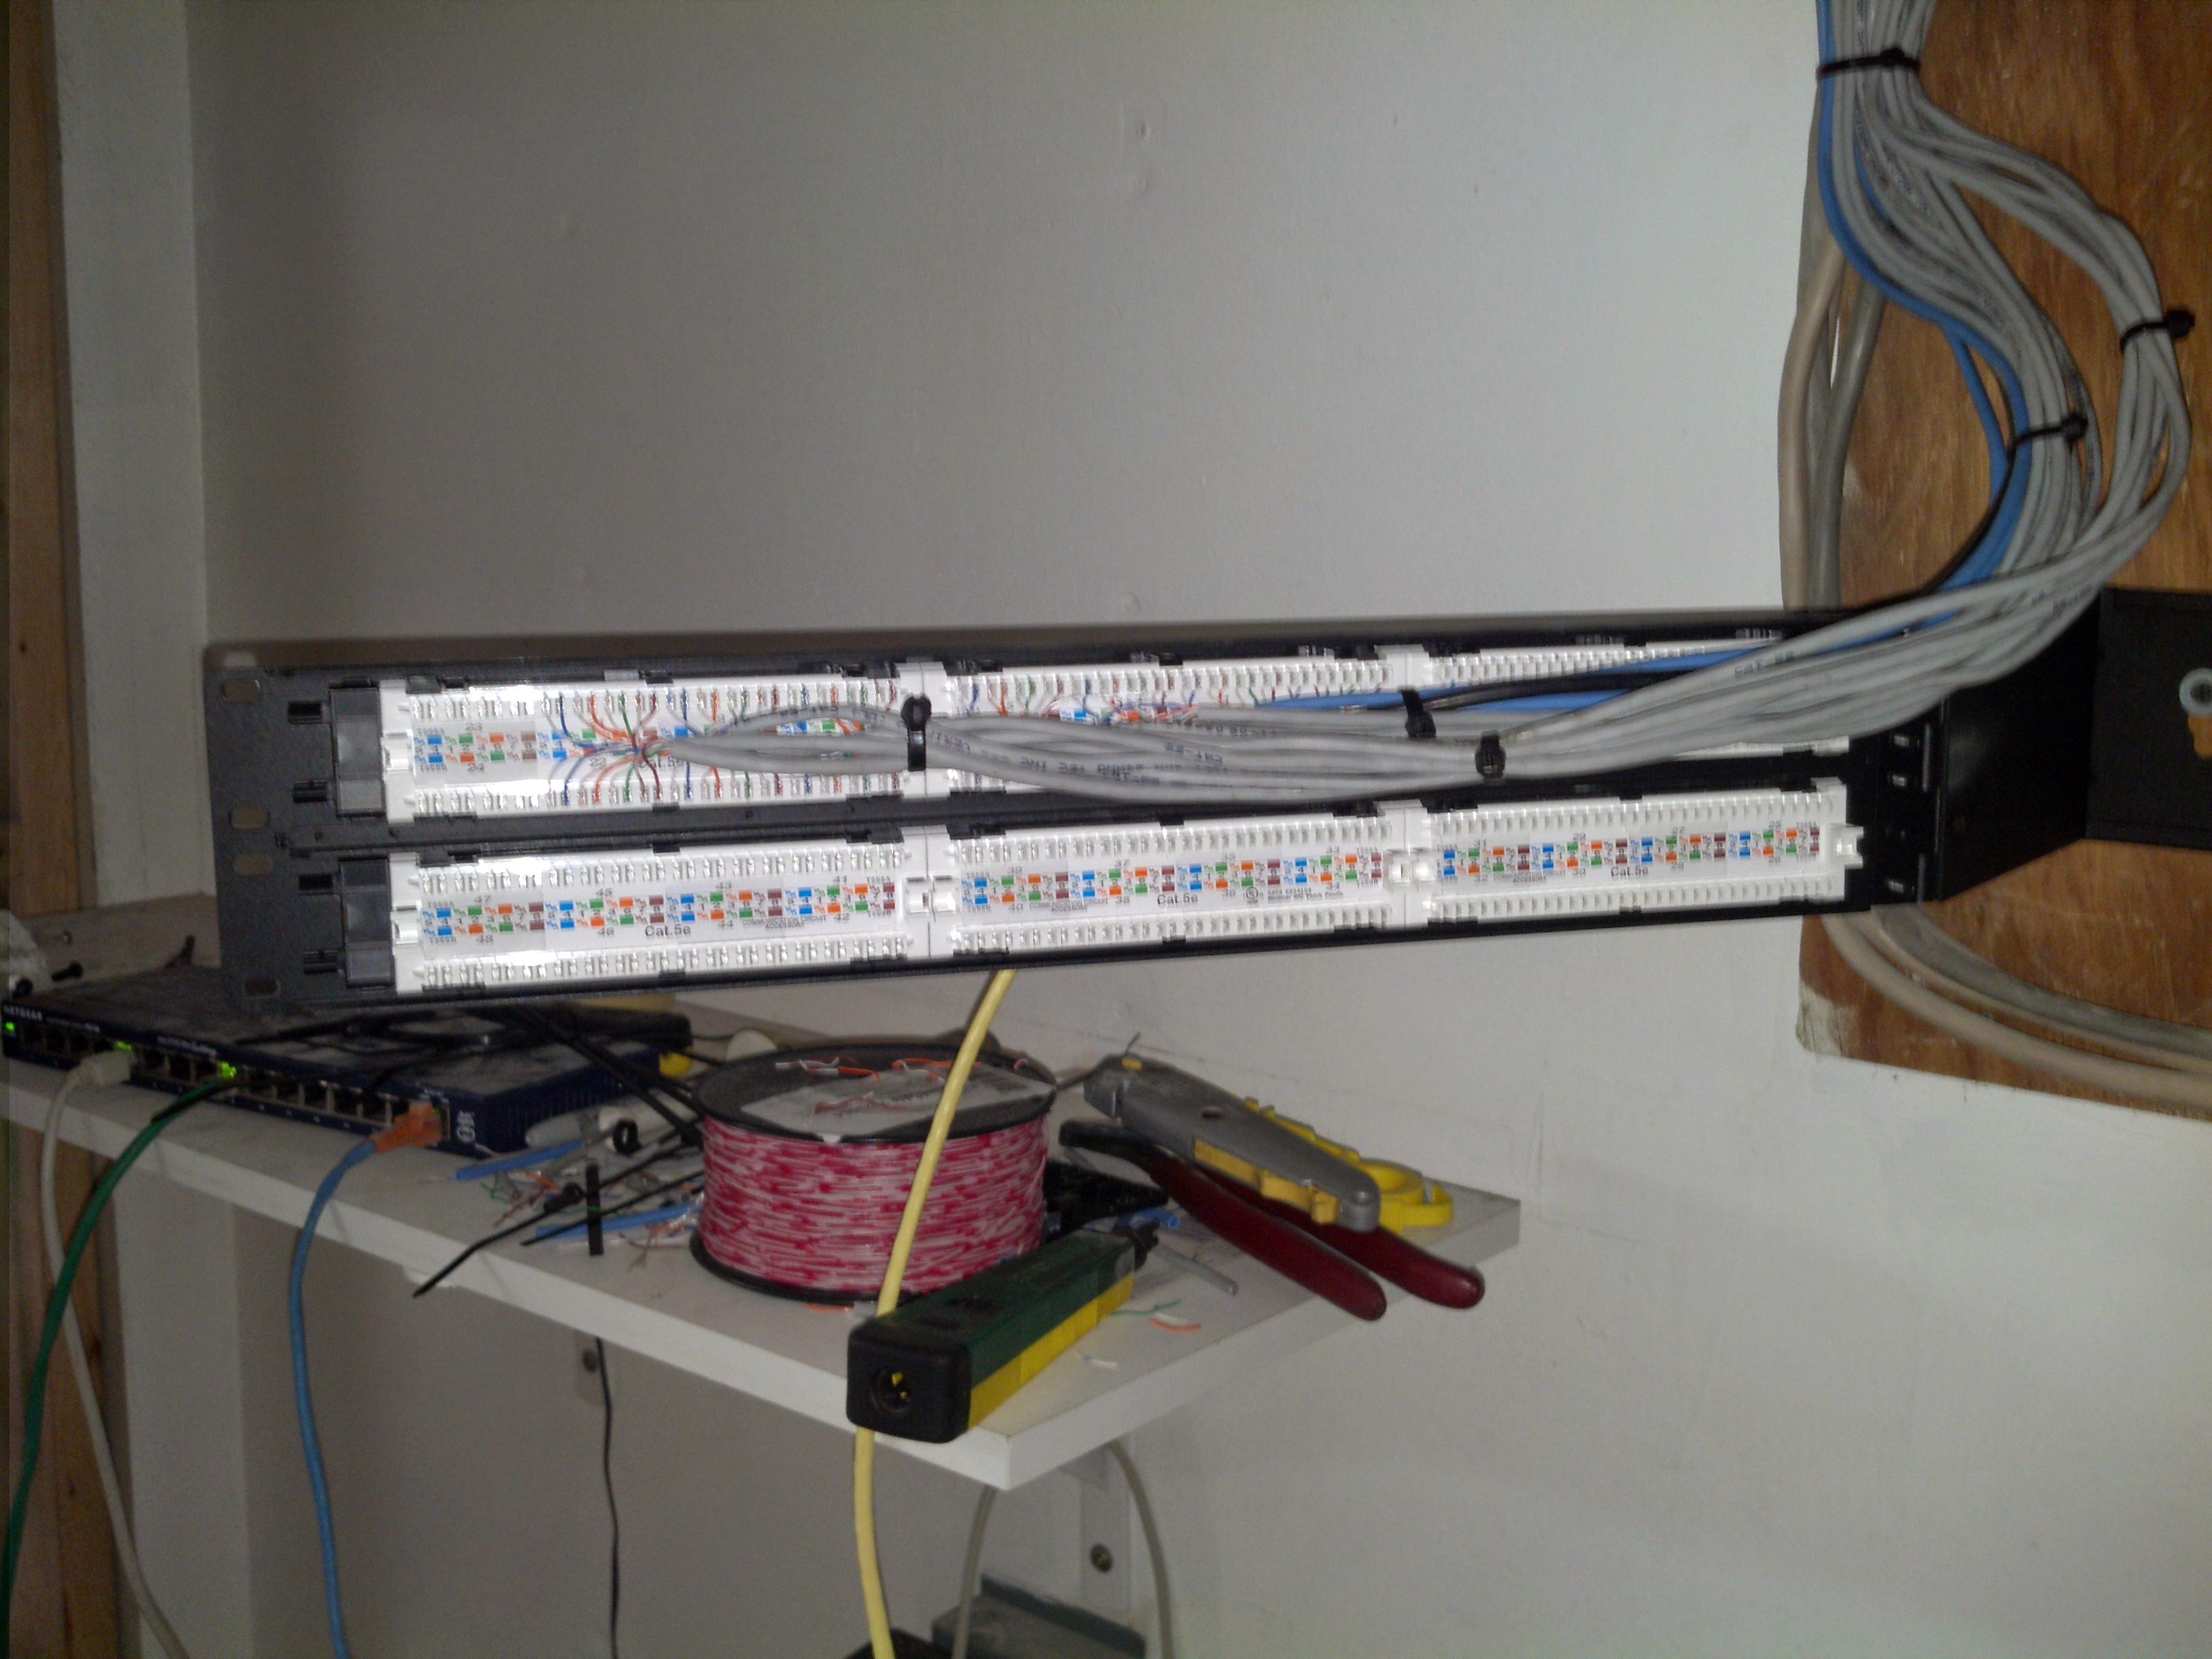
And the dressing:
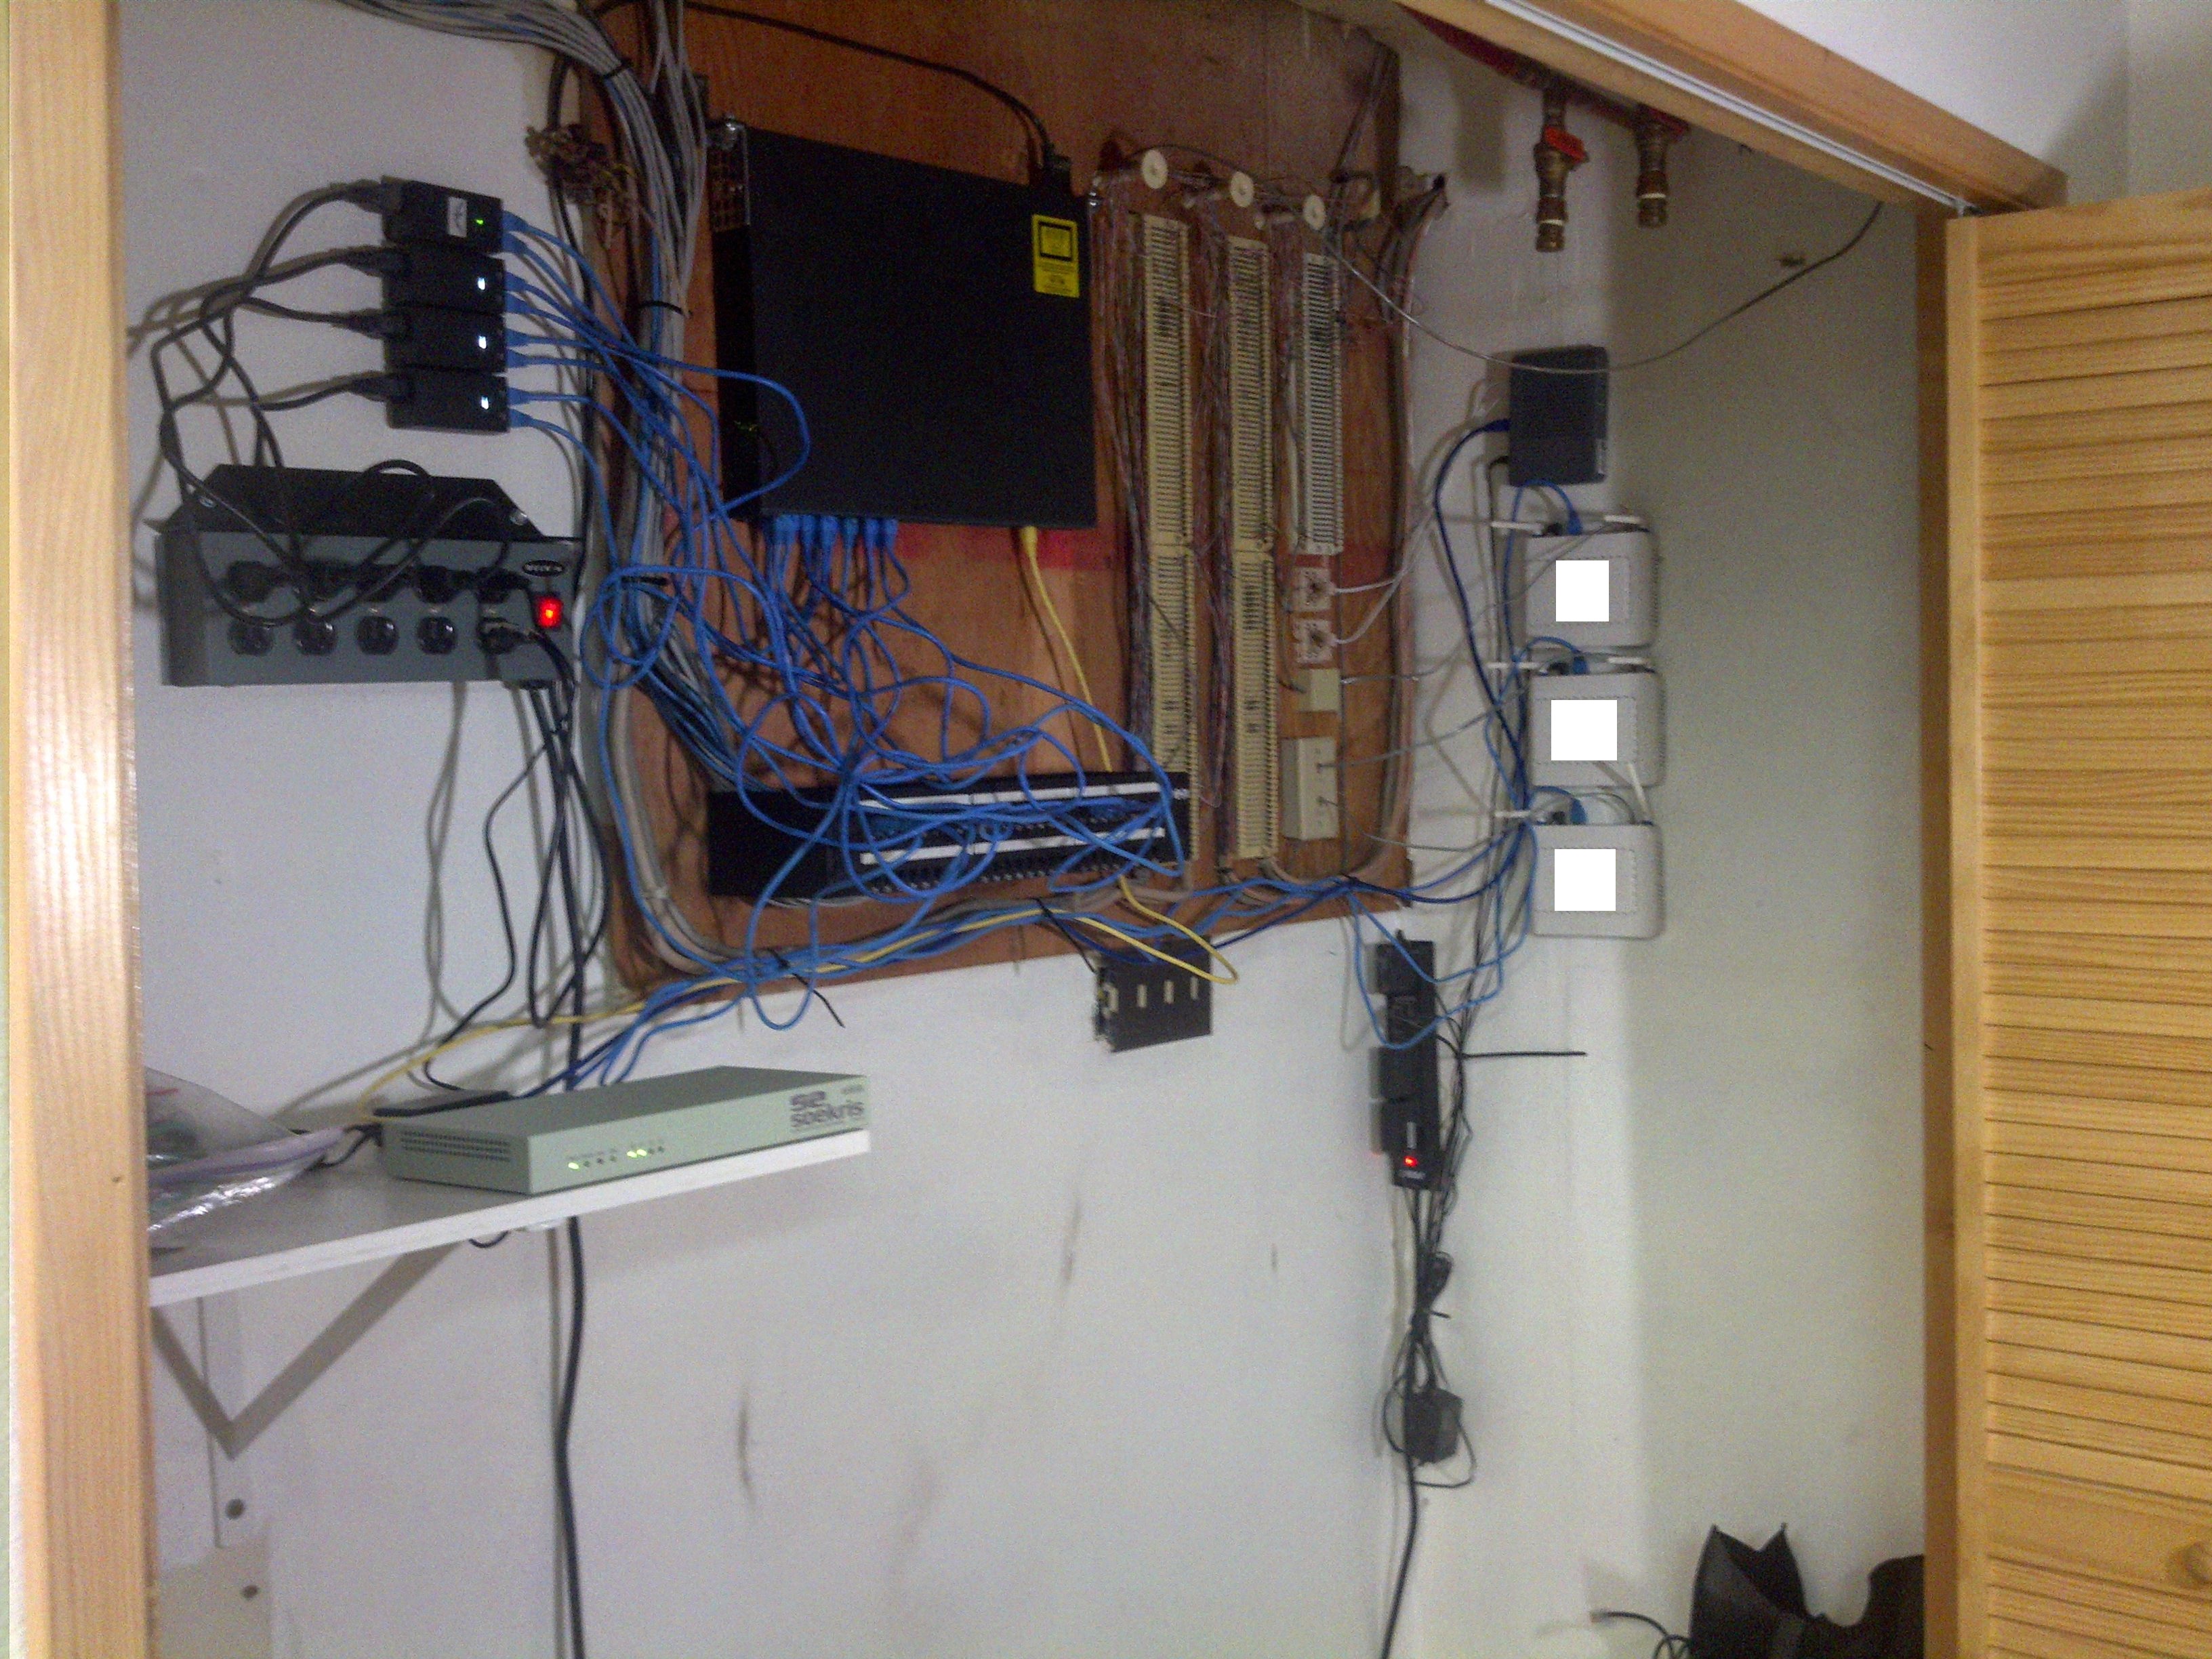
After the POE injectors were velcro’d up, router was installed and cabled, switch was installed and cabled, here is the final product:
The patchwork between the panel and the switch leaves a bit to be desired, but there wasn’t too much I could do with it since they’re so close together. The other part of this project was some outdoor cleanup, unfortunately I didn’t grab a before picture, but here is the after:
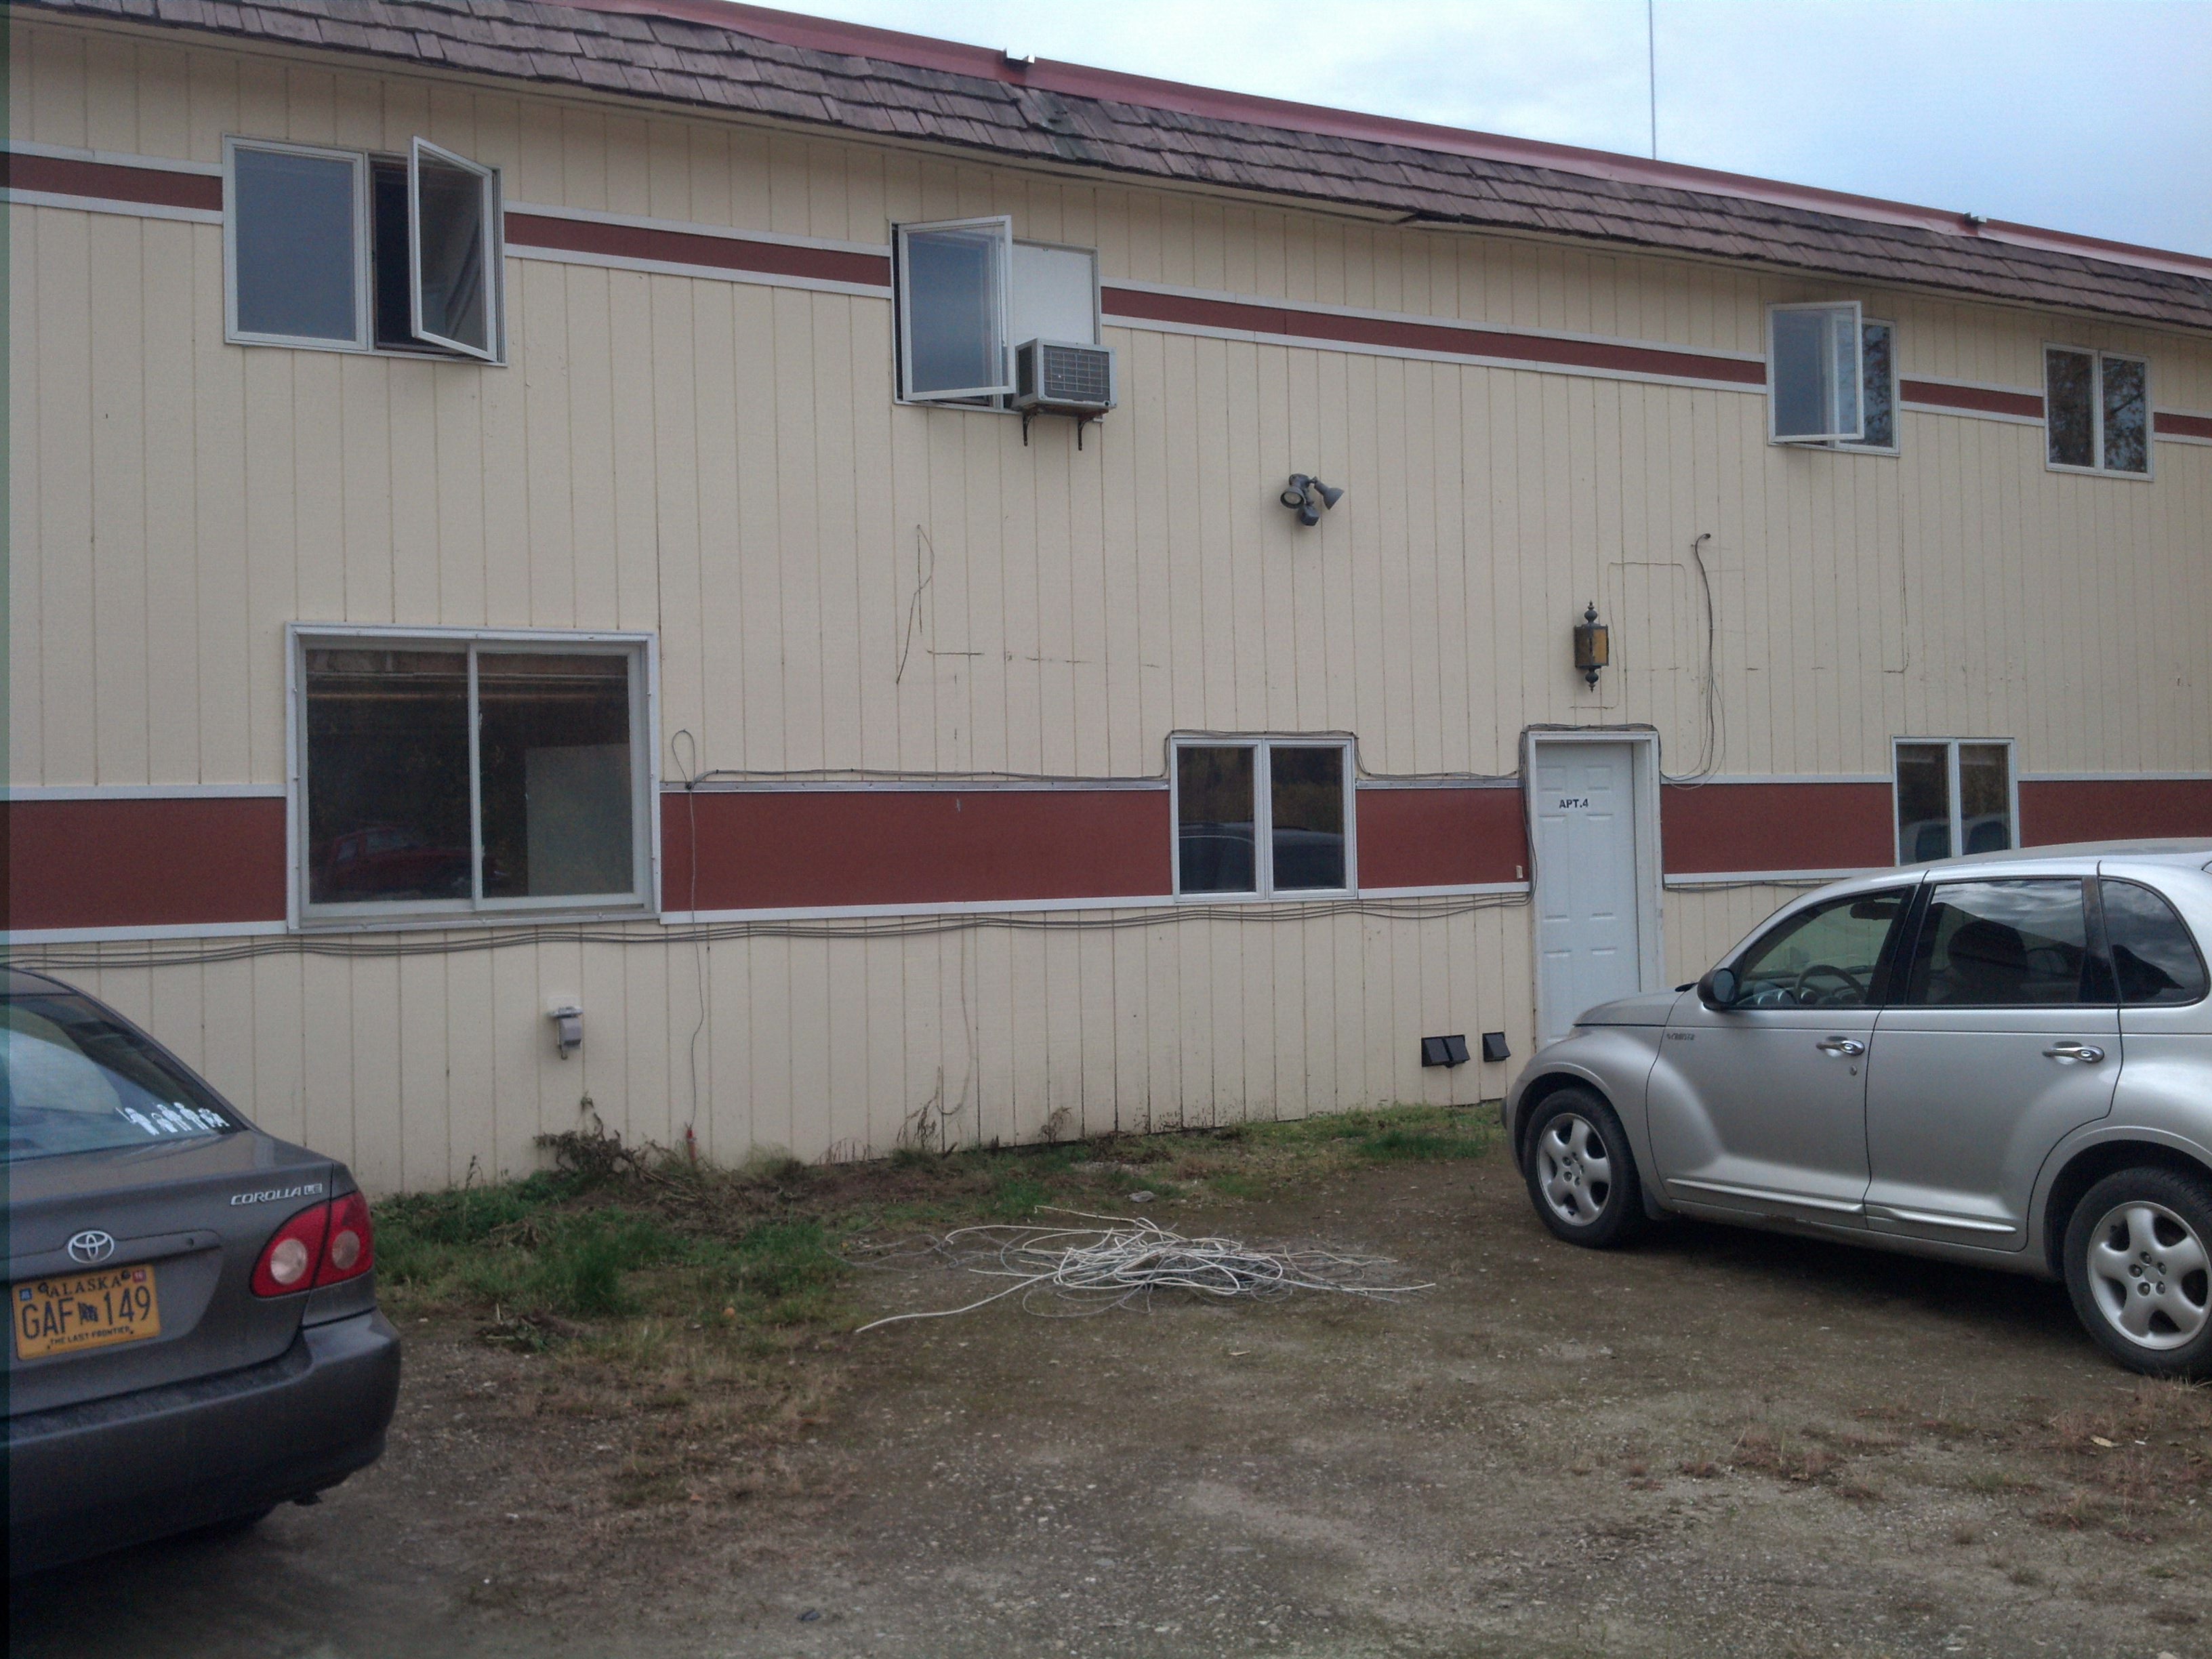
Note the pile of cable that got removed. There was excess draped all over, some even had become part of the weed growth at the base of the building. It’s not pretty, but it’s better than it was.
Repairing the trailer from the snow damage
It came to be that I needed to use the trailer to move some furniture. In case you didn’t see or don’t recall here is a link to see the damage.
Time to repair it, or alternatively pony up $500 or so bucks to rent a truck to get from Chicago to home. The pictures can do most of the talking, but the basic process was as follows:
- I used it in its broken state a bit, so I first had to clean out enough stuff to be able to work inside. I also had to source the roof bows. It so happened that my mother and nephew were traveling by the manufacturer about a week and change before I needed the trailer so I asked them to stop and pick up said roof bows. They were cheap, about $20 a piece.
- I started by figuring out how it was assembled. Basically the roof is a big section that connects 2 corner pieces together and runs the length. It’s lapped and sandwiched together with some light pieces of laminated board inside. I removed all the screws and laminated board so that I could get the roof bows out. You can see in the pictures where I had to peel up some foil to get to the screws.
- I went from front to back cutting out 1 roof bow at a time and replacing it with a new one. I started by supporting the roof off the bow, cutting the bow in the center, it basically fell out with a bit of twisting and bending after being cut in half. I then had to clean the welds on the top plate so that the new bow had a nice place to sit, then I just slid the new bow in place. Wash, rinse repeat all the way back.
- Somewhere along the way when I was bored I cut out about 2 feet from the rear of the roof. This was the section that wasn’t going to be usable anymore and needed to be replaced. I also did my best to straighten out the parts that got kinked in the back corner.
- I propped the new roof bows up high and pulled them down so that they had some good tension. I then welded them.
- Originally the sandwich on the edges was the only thing that kept the roof bows from twisting into and away from each other. I added a third row right down the middle to increase strength. I also used 2×4 instead of the smaller laminated wood to further prevent possible twisting. I think that the original construction was probably adequate, however since I’m not an expert I figured I’d be best served by adding as much meat as I could to prevent this from happening again. I started by placing the separating structures down the top-center, then moved to the side that had come unglued the least and did the side that had separated quite a lot last so that I could do my best to pull it all tight during final assembly.
- Before finishing step 6 I sourced and cut to fit the new rear of the roof. It was 4 foot in length and I only cut out 2 feet so I had a nice overlap.
- Once the whole thing was structurally sound I crawled up on top and used that really shiny really sticky duct tape to make a seal over all the screw holes and at the seams.
- As a last and final protectant I used roof repair sealant everywhere I could. At the edge of all the tape seams and also at the metal seams in the mid section of the trailer and at the tail end.
Anyways, that’s the shortwinded version of how I spent almost the entire week prior to labor day weekend. Enjoy the photos.
 The seam in the back corner, this is where it all started.
The seam in the back corner, this is where it all started.19-Aug-2014 18:33, Motorola XT912, 2.4, 4.6mm, 0.004 sec, ISO 100
 Another view of what I started with.
Another view of what I started with.23-Aug-2014 09:40, Motorola XT912, 2.4, 4.6mm, 0.004 sec, ISO 100
 Before new roof bows - it looks someone wadded up a piece of paper then partially straightened it back out again.
Before new roof bows - it looks someone wadded up a piece of paper then partially straightened it back out again.23-Aug-2014 09:40, Motorola XT912, 2.4, 4.6mm, 0.006 sec, ISO 100
 This is the remnants after removing the original roof bow, it was nice of the manufacturer to weld only on one side so they removed easily.
This is the remnants after removing the original roof bow, it was nice of the manufacturer to weld only on one side so they removed easily.23-Aug-2014 11:49, Motorola XT912, 2.4, 4.6mm, 0.02 sec, ISO 132
 After cleaning up and ready to have the new roof bow placed.
After cleaning up and ready to have the new roof bow placed.23-Aug-2014 11:56, Motorola XT912, 2.4, 4.6mm, 0.01 sec, ISO 141
 The sacrificed portion of roofing.
The sacrificed portion of roofing.23-Aug-2014 12:10, Motorola XT912, 2.4, 4.6mm, 0.002 sec, ISO 100
 After removing the section of roof that had to go.
After removing the section of roof that had to go.23-Aug-2014 12:10, Motorola XT912, 2.4, 4.6mm, 0.004 sec, ISO 100
 The most mangled part that I had to save.
The most mangled part that I had to save.23-Aug-2014 12:19, Motorola XT912, 2.4, 4.6mm, 0.006 sec, ISO 100
 A view from the top, after I turned it into a convertible.
A view from the top, after I turned it into a convertible.23-Aug-2014 12:56, Motorola XT912, 2.4, 4.6mm, 0.003 sec, ISO 100
 This was as good as my hammer and 2x4 body shaping tools could get it.
This was as good as my hammer and 2x4 body shaping tools could get it.24-Aug-2014 09:53, Motorola XT912, 2.4, 4.6mm, 0.009 sec, ISO 100
 About halfway through replacing the old roof bows with straight/true new ones.
About halfway through replacing the old roof bows with straight/true new ones.24-Aug-2014 10:52, Motorola XT912, 2.4, 4.6mm, 0.033 sec, ISO 214
 A look at the makeshift temporary support I had going on while I cut out the twisted roof bows.
A look at the makeshift temporary support I had going on while I cut out the twisted roof bows.24-Aug-2014 11:00, Motorola XT912, 2.4, 4.6mm, 0.029 sec, ISO 100
 Another view of the most pretzeled up of the roof bows.
Another view of the most pretzeled up of the roof bows.24-Aug-2014 11:00, Motorola XT912, 2.4, 4.6mm, 0.035 sec, ISO 100
 The mangled wreckage.
The mangled wreckage.24-Aug-2014 11:39, Motorola XT912, 2.4, 4.6mm, 0.008 sec, ISO 100
 A nice low view of the new roof bows as they're being installed.
A nice low view of the new roof bows as they're being installed.24-Aug-2014 11:40, Motorola XT912, 2.4, 4.6mm, 0.041 sec, ISO 107
 6 of the 7 roof bows in place, but not yet welded. I left the last one out as it would be exposed to the elements had I not.
6 of the 7 roof bows in place, but not yet welded. I left the last one out as it would be exposed to the elements had I not.24-Aug-2014 12:09, Motorola XT912, 2.4, 4.6mm, 0.018 sec, ISO 100
 Picture as things are coming together. This is at the point where 6 of the 7 roof bows were installed inside and it was preparing for transport to my house where I'd finish the project.
Picture as things are coming together. This is at the point where 6 of the 7 roof bows were installed inside and it was preparing for transport to my house where I'd finish the project.24-Aug-2014 12:10, Motorola XT912, 2.4, 4.6mm, 0.001 sec, ISO 100
 The sheet of aluminum that patched the tail end of the trailer. A full sheet cost me $43.
The sheet of aluminum that patched the tail end of the trailer. A full sheet cost me $43.26-Aug-2014 16:14, Motorola XT912, 2.4, 4.6mm, 0.001 sec, ISO 100
 Interior is about 75% done, this picture taken as I called it a night the night prior to departure for Chicago.
Interior is about 75% done, this picture taken as I called it a night the night prior to departure for Chicago.29-Aug-2014 20:37, Motorola XT912, 2.4, 4.6mm, 0.1 sec, ISO 151
 The finished product from inside. Note the 4 new LED lights, they ended up being a quite nice upgrade.
The finished product from inside. Note the 4 new LED lights, they ended up being a quite nice upgrade.30-Aug-2014 11:24, Motorola XT912, 2.4, 4.6mm, 0.014 sec, ISO 100
 The finished product.
The finished product.30-Aug-2014 11:40, Motorola XT912, 2.4, 4.6mm, 0.002 sec, ISO 100